Sunday 31 March 2013

Jouer Tinted Lip Enhancer in Cosmo - Review


This is the result of CultBeauty.co.uk having free delivery for a limited period - impulse orders happen! Well, not impulse entirely as I have been lusting after this since Gem from Gem's Maquillage used it in a tutorial and it looked stunning! You can see that video and the post here. The free delivery just pushed me over the edge, as paying £5 shipping for a tiny £12.50 lip gloss is obscene, in my eyes.

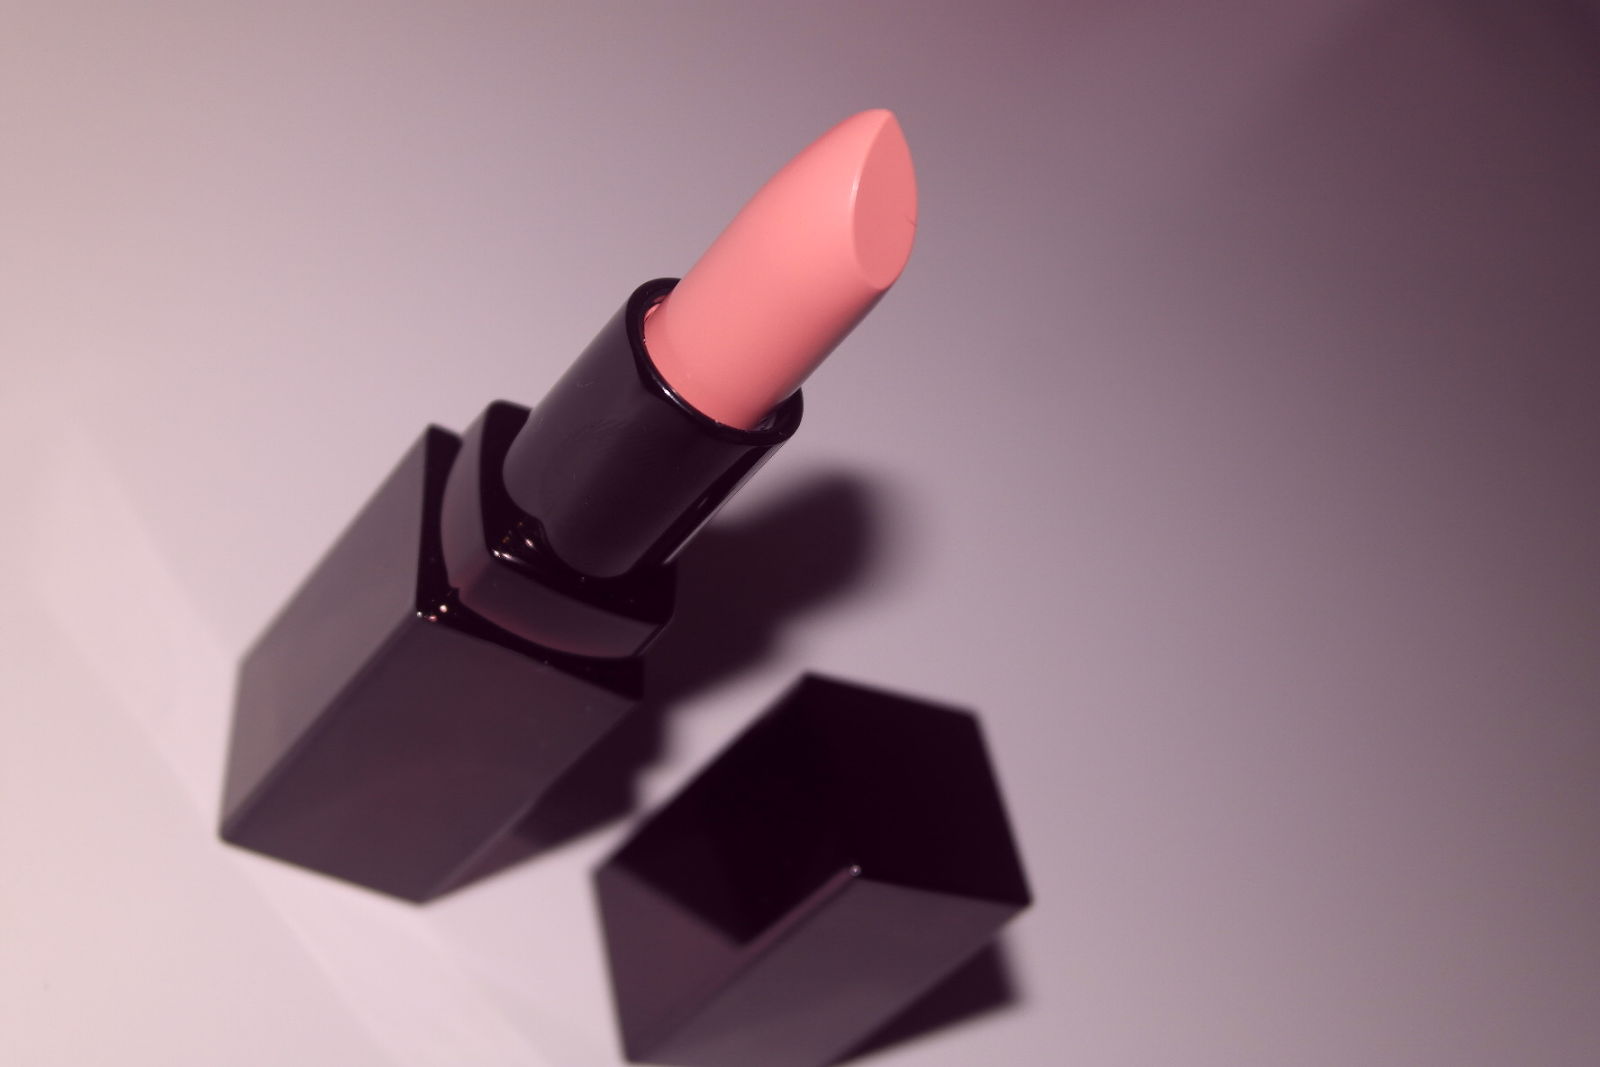
Jouer Tinted Lip Enhancer in Cosmo - £12.50 at Cult Beauty

I've realised that I am loving the lip gloss/lip balm hybrid that is also what I would describe Clarins' Instant Light Lip Perfector's as. This Jouer offering is no different and really lovely in terms of texture and colour. The colour is described on CB as a sheer poppy-pink, I believe it contains a slight shimmer but it translates as a glow on the lips - not glittery in the slightest. It's not sticky at all, something I love about these balm/gloss formulas as who likes a sticky lip gloss?! No one. 


Granted these options need a bit more topping up than their stickier contenders but thats fine by me. The quality of the Tinted Lip Enhancer is really great, very high end - and for the price?! It's roughly £5 cheaper than the Clarins alternatives that I so love - so thats a plus!

Cosmo Tinted Lip Enhancer swatched on my hand
Me wearing Cosmo with nothing else on 
The photo above is quite a light application, you could apply a bit more for a slightly more intense colour, but the point of these is that they 'enhance' your own lips in a natural and nourishing way with a glossy finish. I absolutely love the formula, the packaging and the colour. It's my first product from Jouer, and having heard so many rave reviews about many products, particularly the Matte Moisture Tint, I'm impressed! 

You can pick up the Tinted Lip Enhancers from CultBeauty.co.uk as long as lots of other Jouer products. 

Have you tried any Jouer products?


Saturday 30 March 2013

Laura Mercier Crème Smooth Lip Colour in Arabesque - Spring '13 Collection

Laura Mercier Crème Smooth Lip Colour in Arabesque - £20
After photographing this lippy, it became apparent that taking pictures of lipsticks is in fact my idea of a good time, who'd a thought 'eh?


I picked up this Laura Mercier Crème Smooth Lip Colour in Arabesque a few months back in John Lewis when shopping in Central London. This lipstick is part of the Arabesque Collection for Spring '13 and I was won over by the colour immediately. 


Arabesque is a gorgeous peach pink shade, smooth and creamy with no shimmer.


  The colour pay-off is nice, the texture is really creamy and very easy to apply. It feels moisturising on the lips, however because it's such a creamy formula, it does accentuate flakes, dry patches and settles into lines *frowns*. I have a problem with a lot of lipsticks for this reason, but this one does accentuate problem areas quite badly. It looks really nice blotted in slightly after I've scrubbed my lips and applied a lip balm which I normally do anyway before applying lip products.

Arabesque Crème Smooth Lip Colour
swatched on my hand

I do really love the shade and it looks lovely under lip glosses of a similar shade for a more full lip effect. Like all LM's products, the packaging is beautiful, really chic and expensive looking. It feels nice and weighty too!

You can pick up Arabesque from any Laura Mercier counter or on Space.NK for £20, but I do think it's limited edition so it wont be around forever!

Have you tried any Laura Mercier products?


Thursday 28 March 2013

Eylure Dylash Kit Review


Eylure Dylash Eyelash and Brow Dye Kit - £7.14 at Debenhams


On a whim, I decided to pick up this Dylash Eyelash and Brow Dye Kit as I've always fancied a more rich colour for my taupe coloured brows. I have quite ashy tones brow hairs and being brunette, I've never thought that they matched my hair properly, bearing in mind most peoples don't.

I thought I'd give this kit a go just to see what kind of results I got, as I'm so reluctant to have other people tamper with my brows - their my babies!

My eyebrows before:


The dyeing process:

I started off with cleansed skin and removed any oils/make-up from my eye area with Bioderma Crealine H20.


The circular well inside the packaging was to be used to create the dye and house the ingredients.


I squeezed roughly 2cm worth of Dylash Cream Colour into the well.


I then dropped in 5 drops of the Dylash Activating Solution.


The last step was to mix the two together with the plastic wand provided until a creamy consistency was formed. 


I then brushed the cream through both brows with the spoolie provided in the pack, ensuring to coat each hair sufficiently. Loving my scouse brow look here! LOL


My eyebrows after:


 The end result was very subtle, and not that dramatic. I didn't expect a very dark colour but I do think the tint made a slight difference. 

Before and after comparison:


The darkness of my brows is basically the same, it's more the tone of my brows that have changed. They have gone from a taupe shade to a more classic brown shade. They also looked fairly glossy afterwards which they never normally do. I'm glad that they still look natural and I am quite pleased with the result.

I will add that the tint was most noticeable after I'd applied my brow products when putting on my make-up the next day, my brows did look quite a bit darker which took me by surprise as I didn't think they would.

The overall process of dyeing my eyebrows was really easy and the tools in the kit made it quick and mess-free. I won't be using it for my lashes (although you can use it for both) as my lashes are already really dark.

Have you tinted your brows before?


Lip Liners for Medium Skintones


Being of a medium skin tone, I often find it difficult to find lip shades that provide a 'nude' lip look on me without looking ill. If you are of similar skin tone to me, you will understand how much nude lipsticks that look great on lighter skin gals can sometimes wash you out and make you look strange. Colours such as MAC's Creme D'Nude Lipstick would just look dreadful on me and I try to steer clear of them. Thinking about all the great lip colours I've accumulated recently, I thought I'd do a post to share the lipliners that look nude on medium skins without being too light.

I use lip liners daily as they are so quick and easy. I fill in my whole lip with the pencil and apply a gloss on top! A really easy nude lip that makes your lips look full and gorgeous. (My lipgloss addiction is for another post of it's own, it's unhealthy and I much prefer a gloss to a lipstick!)

Most of these shades are quite brown based, which serve as a great 'nude' shade on me. 

From Left to Right:
No7 Perfect Lips Liner in Nude, Rimmel Exaggerate Lip Liner in Eastend Snob, Rimmel Exaggerate Lip Liner in Addiction, Rimmel Lasting Finish 1000 Kisses Lip Liner in Natural, Rimmel Lasting Finish 1000 Kisses Lip Liner in Wild Clover, L'Oreal Contour Parfait in Honey,  Nyx Lip Pencil in Natural, MAC Lip Pencil in Subculture.

The No7 Perfect Lips has a really creamy texture, as do the Rimmel Exaggerate Lip Liners and the MAC Lip Pencil. The other pencils have a more rigid texture but still nice to apply. My favourtie shades are probably Subculture or Honey as they do look really nude on. Shades such as Eastend Snob and Wild Clover contain more colour but would still look nude on medium or darker skins when topped off with a nude lipgloss. 

If you've never tried a lip liner before because you don't like outlining your lips - try filling in the whole lip and applying a similar or clear gloss on top! You can use liners as a base coat underneath lipstick too for a more long-lasting lip colour.


What are your favourite nude lip shades for your skintone?


Monday 18 March 2013

This or That! (Tag)

So I was reading Chels from chelschapman.blogspot.co.uk's blog and I saw that she did a This or That tag with lots of fun questions. Check out her blog if you like beauty and fashion posts, it's great! 

I thought I'd give it a go as it's a way of you all getting to know me a bit more. Feel free to do the tag yourself too and let me know! :-)

Makeup:

1. Blush or Bronzer?
Blush

2. Lip Gloss or Lipstick?
Lipgloss

3. Eyeliner or Mascara?
Mascara

4. Foundation or Concealer?
Foundation

5. Neutral or Coloured eye shadow?
Neutral

6. Pressed or loose eye shadows?
Pressed

7. Brushes or Sponges?
Sponges (for foundation & concealer)


Nails: 

8. OPI or Nails Inc?
OPI

9. Long or short?
Long

10. Acrylic or natural?
Acrylic

11. Brights or Dark's?
Darks

12. Flower or No flower?
No flower


Body:

13. Perfume or Body Spray?
Perfume

14. Lotion or Body Butter?
Body butter

14. Body wash or soap?
Body wash


Fashion:

15. Jeans or Sweatpants?
Jeans

16. Long sleeve or short?
Long sleeve

17. Dresses or skirts?
Dresses

18. Stripes or Plain?
Plain

19. Flip flops or Sandals?
Sandals

20. Scarves or Hats?
Scarves

21. Studs or dangly earrings?
Studs

22. Necklaces or Bracelets?
Necklaces

23. Heels or Flats?
Flats

24. Cowboy boots or Riding boots?
Riding boots

25. Jacket or Hoodie?
Jacket

26. Top Shop or River Island?
Topshop


Hair:

27. Curly or Straight?
Straight

28. Bun or Ponytail?
Bun

29. Bobby pins or Butterfly clips?
Bobby pins

30. Hairspray or Gel?
Hairspray

31. Long or Short?
Long

32. Light or Dark?
Dark

33. Side sweep bangs or Full bangs?
Side sweep

34. Up or Down?
Down


Random:

35. Rain or shine?
Rain

36. Summer or Winter?
Winter

37. Fall or Spring?
Fall

38. Chocolate or Vanilla?
Chocolate

39. Shower or Bath?
Shower

40. Comedy or Horror?
Comedy


Hope you enjoyed my answers! 


How to follow my blog!

Hello hello!

With all this panic concerning Google Reader becoming extinct, I thought it would be a great opportunity to let you know how you can follow my blog without being a follower via Google Friend Connect.

You can follow me via BlogLovin' to keep up to date with all my posts.

You can also follow me via Twitter, where I always posts links to new posts that go up.

I have an Instagram profile too - my username is @cocomykel

I try to follow everyone that follows me, so get following! I love discovering new blogs!


15/03/13 - Feeling Ill and Dehydrated


I posted this picture on Instagram (@cocomykel) the other day of the products I'd used in the morning to try and perk my skin up a bit. I've been a bit ill the past week and that particular morning my skin was feeling really dry and tight. After cleansing with Nude Cleansing Oil and Emma Hardie Moringa Cleansing Balm, I toned using Biologique Recherche P50 which is a product I got recently that I've been really eager to try, but not traditionally a toner. It's quite a strong liquid containing lots of exfoliating ingredients such as Glycolic Acid to purify and exfoliate the surface of your skin to reveal clearer and more smooth skin. I'm yet to write about it on the blog as I want to use it for a bit longer first, but I'm really impressed so far. I then followed it up with Hydraluron Serum which I've been using for ages and you can read about it in my review here. For moisturiser, I actually used a night cream as I was just around the house and running a few errands so I wasn't wearing any make-up. I used the Trilogy Age Proof Replenishing Night Cream which is another recent purchase after my previous night cream had run out. This stuff is so concentrated, unbelievably so, and feels so luxurious on the skin. It contains lots of lovely ingredients such as Omega 3, 6 and 9, Hyaluronic acid, Marula Oil, Evening Primrose Oil and Olive Oils. The consistency is thick but melts gorgeously into skin and feels really hydrating without being greasy. Really, really enjoying this so far. I then finished off with my favourite eye cream Emu Oil Well Moisturising Eye Cream and my go-to lip balm at the moment the Nuxe Reve De Miel lip balm in the stick form (as I have long nails and the pot version would be a nightmare!)

After all this (phew!) my skin felt comfortable and hydrated all day which makes such a difference when you're feeling rough.

What are your favourite products when you're feeling under the weather?


Friday 15 March 2013

My Favourite Concealer - MAC Pro Longwear Concealer in NW25 (Review)

MAC Pro Longwear Concealer in NW25 - £14.50
First things first, I am a complete concealer junkie. I didn't actually realise this until I looked at how many concealers I had and I wondered 'why do I buy so many?'. The reason is, I really cannot stand under-eye darkness. I loathe it. And I have quite bad darkness under my eyes which is really problematic to me, I have a tough time finding a concealer that covers it well enough. But with the under-eye area, it's not just about coverage - it's about longevity too. How long is this concealer going to last on me? I've always had a problem with concealer creasing, fading, sliding - you name it. I have so many and am always on the hunt for more. I'm quite keen to get my hands on the new Nars Radiant Creamy Concealer (here) as I've heard such great things about it's coverage and wear. But for the time being, I introduce you to the concealer that I am absolutely loving at the moment, and that is quite something coming from a concealer snob.

The first thing that drew me to the MAC Pro Longwear Concealer is the 'Pro Longwear' part. As I mentioned, I find it really hard to get concealers to stay on me without fading or creasing, despite setting them with powder. I was intrigued by the impressive title so I decided to look at reviews for more information. I went onto MakeUpAlley (where you can find reviews on most make-up products on the market) and was so impressed by the comments and claims. 'No creasing', 'lasts all day', 'great coverage' etc etc. I was also really sold on the fact that it is a liquid with high pigmentation. The liquid consistency means that you can work in thin layers but still get the coverage - eliminating any chance of creasing.

In MAC I am an NC42 or C5 (it can change depending on how tanned/not tanned I am) and was unsure what shade to order as I was doing it online. Lots of reviews mentioned that they got their concealer in an NW. For anyone not familiar with MAC's shade system:

C is Cool - Yellow - Golden Olive
NC is Neutral Cool - - Golden Beige
N is Neutral - Beige
NW is Neutral Warm - Pink Beige
W is Warm - Pink

MAC like to confuse all of us and refer to what we would call warm (yellow, olive undertones) cool, and what we would call cool (pink undertones) warm. How confusing. 

My skin has a golden, yellow undertone but under my eyes is dark and needs correcting. For this reason I chose an NW25 in the Pro Longwear which is absolutely perfect for me. NW25 is a pink beige colour slightly lighter than my skin colour. NW25 seems like it would be worlds away from NC42 but it is actually quite dark. I was fairly sure this colour would be good for me as I am quite familiar with MAC shades, but if you are unsure I really recommend going in store to get your perfect shade.

 This shade really helps to correct and lift the darkness under my eyes which is something that all my other concealers in more neutral tones couldn't tackle. This concealer is so concentrated and it covers so well - I wanted it slightly lighter than my skin colour as I love the bright under-eye Kim Kardashian look and this concealer does it very subtly but effectively. It's so liquid-y and easy to blend (I use my Beautyblender) and sets really quickly which enables me to build layers without it becoming cakey and thick. Another thing I search for in a concealer is if it looks natural. If a concealer looks really heavy and obvious then I don't think it's doing it's job. Make-up is there to enhance what you already have, creating the illusion that you have perfect skin. I remember when I was reading reviews about this concealer, a male reviewer said that he wore it because it was so covering but so undetectable - this concealer is really lightweight and applies smoothly which makes it look really natural but it still gives the coverage.

The wear time is great and it's still hanging on at the end of a long day. I make sure that I always use eye cream under my eyes and let it skink in before I apply my concealer as I can get quite dry under there, which makes concealer look horrible. I set this concealer with my Ben Nye Banana Powder which is yellow toned and helps to brighten on top of the pink toned concealer.

All in all, if you struggle with concealers fading and creasing and have a lot to cover - this concealer might just be the one for you. You can pick up MAC Pro Longwear Concealer online at maccosmetics.co.uk or at any MAC store.

Whats your favourite concealer?


Thursday 14 March 2013

OOTN: Anniversary Date - 13/03/13


It was me and my gorgeous boyfriend Jake's 3 year anniversary yesterday so we popped out for a meal to celebrate. As always it was a great night and was so nice to celebrate 3 amazing years together.

Jake always moans that I have to have a new outfit for every occasion, which is true and this girl ain't stoppin' anytime soon! Events and occasions are just too much of an excuse to buy a new outfit - I know I'm right. 

As for this outfit, Jake was pleased to know that I nabbed this vintage dress from a charity shop, paired with my trusty Topshop leather jacket and my new favourite heels, my Zara nude pointed pumps. As we were only going to Chiquitos (our fave place at the moment), I didn't want to look too dressy, so the leather jacket gave the fitted dress a bit of an edge. 

I'm also loving monochrome at the moment as you can see, although the panels are black and cream not black and white. Also see my bag on the left - my new monochrome beauty from New Look (here). I realised when about to step out the door that my bag and outfit didn't go as it was far too matchy-matchy, but it wasn't too tragic. The bag itself is such a bargain at £14.99 and is such good quality, when I saw the price I just had to have it. Not as practical as my Zara City Bag with all it's compartments and zips but still looks gorgeous carried over my arm.

I kept my make-up simple with a some winged eyeliner and a peach gloss lip as well as foundation, concealer etc. I used my Nars Sheer Glow foundation which I'm still on the fence about over a year later. I shall keep using it and might vent my opinions on the blog soon.

Sorry about the quality of the photos, I didn't have my camera so impromptu outfit photos were snapped on my iPhone!

Are you a fan of the monochrome trend?


Wednesday 13 March 2013

The Classic Beauty Blender Review


Beautyblender Classic Duo Set - £24.00 here.
The Beautyblender is something I have been wanting to try for so long and I have no idea why I waited because I think it is the best thing I have ever applied my foundation with - ever.

A lot of foundations I like are quite lightweight and dewy - meaning that sometimes because they are light and fluid they can look streaky if applied with a brush. A brush also doesn't allow much coverage to be built up with these more lightweight foundations, but this is where the Beautyblender really succeeded for me.

I start by running the blender under cold water and squeezing repetitively so it soaks up water and doubles in size, becoming spongey and more springy. I then squeeze out the excess with my hands until it doesn't release any more water, followed by gently blotting excess moisture with a towel. I now have a fluffy and slightly damp blender to begin my make-up application with!


The sponge allows you to press and blot the foundation into your skin, taking away any chance of streaks or un-even application. Pressing it into the skin also keeps it lasting so much longer than applying it with a brush - for me anyway. Because you are pressing rather than 'painting' it on, it allows you to work in layers, pressing the foundation into the skin on the areas you need more coverage until you have the amount you need. Squeezing and pressing with the blender also seems to release more product which is great also - the sponge doesn't just absorb it all up and waste product.

The slight dampness of the sponge when you use it makes the foundation apply better, as if you were using MAC Fix+ to help it blend better. The application is so even and so easy to apply.

I use the pointed tip with my MAC Pro Longwear Concealer in NW25 to again work in layers and build up coverage under my eyes and around my nose and mouth (the areas I need it most). The blender applies this liquid concealer like a dream and working in thin layers, I can press the product in rather than blending it out with a brush. By pressing it in I can get such a higher amount of coverage for the product I'm using as it's not just being blended away. The thin layers along with the concealers quick setting time means that I can build up coverage quickly but without it looking cakey or creasing.

This sponge has made my make-up in the mornings so quick and easy to apply - I can do it quickly and evenly with long lasting results - whats not to love??

-

I really really really recommend the Beautyblender for foundation, concealer, cream blush, liquid highlighter, cream highlighter.......the list goes on. 

Have you ever tried the Beautyblender?


Tuesday 12 March 2013

YSL Touche Éclat Foundation in BD50 Review


Yves Saint Laurent Touche Eclat Foundation in BD50 - £29
I have been meaning to do this review for a few months now as I have been really enjoying using this foundation. The YSL Touche Eclat Foundation is a light to medium coverage very dewy foundation which brightens the complexion and gives your skin a lovely glow.


The packaging is really something too - the glass bottle with gold top looks gorgeous on any dressing table and despite being glass is fine for travelling with (for me).

No make-up (Christ!)
Wearing nothing but YSL Touche Eclat Foundation in BD50
The shade is perfect for me, not too dark and not too light, pretty spot on.  You can see from the above photo that the foundation is very dewy and I always like to set it with powder to make sure it lasts longer. I do this with all my foundations as it can wear off on me without. 

Full face done and set with powder!


Despite setting it lightly with powder my skin still looks radiant and the coverage is enough just to even out skin tone and minor blemishes - it did a great job at tackling a scar from a blemish on my cheek which I didn't go over with concealer!

If you like a light to medium foundation with a dewy finish then this one could be for you! It feels really lightweight when I have it on and lasts quite nicely throughout the day.

Have you tried the Touch Eclat foundation?


(P.S I'm wearing:
Blazer - Primark
Shirt- Sparke & Fade
Necklace - H&M)